I am the proud Maid of Honor for one of my best friend's (and coincidentally she is also my cousin) upcoming nuptials! And one of my duties is to plan an incredible bridal shower for her! I've been perusing etsy and pinterest and googling to my heart's delight to try to find the cheapest way to create a fantastic bridal shower that doesn't look like it's been done on a budget! The plans really started to take shape after I came up with the idea of doing a crepe bar (which I have since discovered was hardly an original thought!)! With the food decided I found the ideas for the decorations flowed right along. I've been folding circular fans for the decor in my free time, as well as designing and making the invitations, and attempting to organize some activities, favors, and the rest of the menu and decor. But this blog entry is actually going to be just about the cake stands I made for the crepes!
I've been wanting to get myself a cake stand for quite awhile now. Just a simple and elegant white one. And while debating when and where I should purchase one of these I realized that cake stands would be a really cute way to serve the crepes at the bridal shower. I wanted two, one for each side of the table. The only issue was that I couldn't afford to actually buy cake stands to use. Luckily it was pinterest to the rescue! Someone had posted a picture that had a short tutorial on how to make your own using dollar store dishes. So I hurried my butt over to my local Dollar Tree and purchased a couple simple glass candle candlesticks and some plates (I also bought a few bowls after I realized what a cheap place the dollar store is to get some vintage looking glass bowls for a DOLLAR! YES!). Then I raced over to the Home Depot. The helpful associate pointed me to the perfect primer and spray paint for the job. Guaranteed not to come off of anything. This point was emphasized a few times and I was encouraged to wear old clothes that completely covered my skin and to make sure and put down lots of plastic. I forget what type of spray paint it was but I'm sure the folks over at Home Depot can help you discover it for yourself! I bought the primer, and I also bought a can of white for the base of the cake stand (otherwise known as dollar store glass candlesticks) and a can of yellow for the top of the stand (or the dollar store plates). After all the purchased were made all that was needed was a little time to do some spray painting and then to glue the white candlestick to the yellow plate!
This was such a simple project to manage and the result looked like something that you would actually want to buy, so I was very pleased! I recommend that everyone try this! I plan on using white doilies between the plates and the stand, because I'm not sure if you can serve food on something that's been spray painted? But if that's an issue for some of you then a simple fix would be to purchase a plate with the color that you want, or I've even been wanting to make some out of vintage plates for a unique look! There are many options and there's sure to be a perfect one for you!
Showing posts with label diy. Show all posts
Tuesday, June 5, 2012
Bridal Shower DIY
Labels:
bar,
bridal shower,
budget,
cake stand,
candlestick,
cheap,
crepe,
diy,
do it yourself,
doilies,
dollar store,
dollar tree,
etsy,
home depot,
pinterest,
plate,
primer,
spray paint,
vintage
Monday, April 16, 2012
String Lanterns
Years ago, while working as a HR assistant temp in a call center, I saw the most amazing/easy/genius/cheap decoration being used for company parties. One of the managers was a fan of DIY and this was one of her creations (that I have since seen all over the place). It's a simple concept really. She used round balloons to make hers, but I was too lazy to look all over for round balloons (at the time I was living in a small town with barely more than a Walmart). I used regular balloons, and though she thought that using regular balloons made this decoration look too much like an egg, I felt that it turned out just fine with the right paint on it. I've hauled this decoration with me through two different moves and had countless compliments on them. I've also had a LOT of people ask me how to do it.
This is a very inexpensive project. The only things you really need are balloons (your choice as to to the balloon shape!), some sort-of recipe for paper mache glue (there are all kinds of recipes available online if you do a google search), and a thick string or yarn. And of course paint if you choose to customize the look a little bit (I painted these gold, then spray painted them with gold glitter. I then filled each of them with some brown and white vanilla-scented potpourri.). I recommend getting as creative as you can! Nothing is quite as freeing as coming up with something unique that you are creating for yourself and that is exactly what YOU want and are picturing in your mind!
Step 2: Mix up a batch of your paper mache glue.
Step 3: Dip your string/yarn in the glue until it is coated.
Step 4: Wrap the string/yarn around the balloon every which way until it has the look you want (you need to wrap it enough for it to have a strong framework).
Step 5: Let dry.
Step 6: Pop the balloon!
Step 7: Paint/decorate it to your heart's content! :)
Step 8: Hang or display where you want.
Labels:
brown and white,
cheap,
decoration,
diy,
do it yourself,
Fun,
glitter,
Gold,
google,
hanging,
paper mache,
potpourri,
string,
string lanterns,
yarn
Wednesday, July 20, 2011
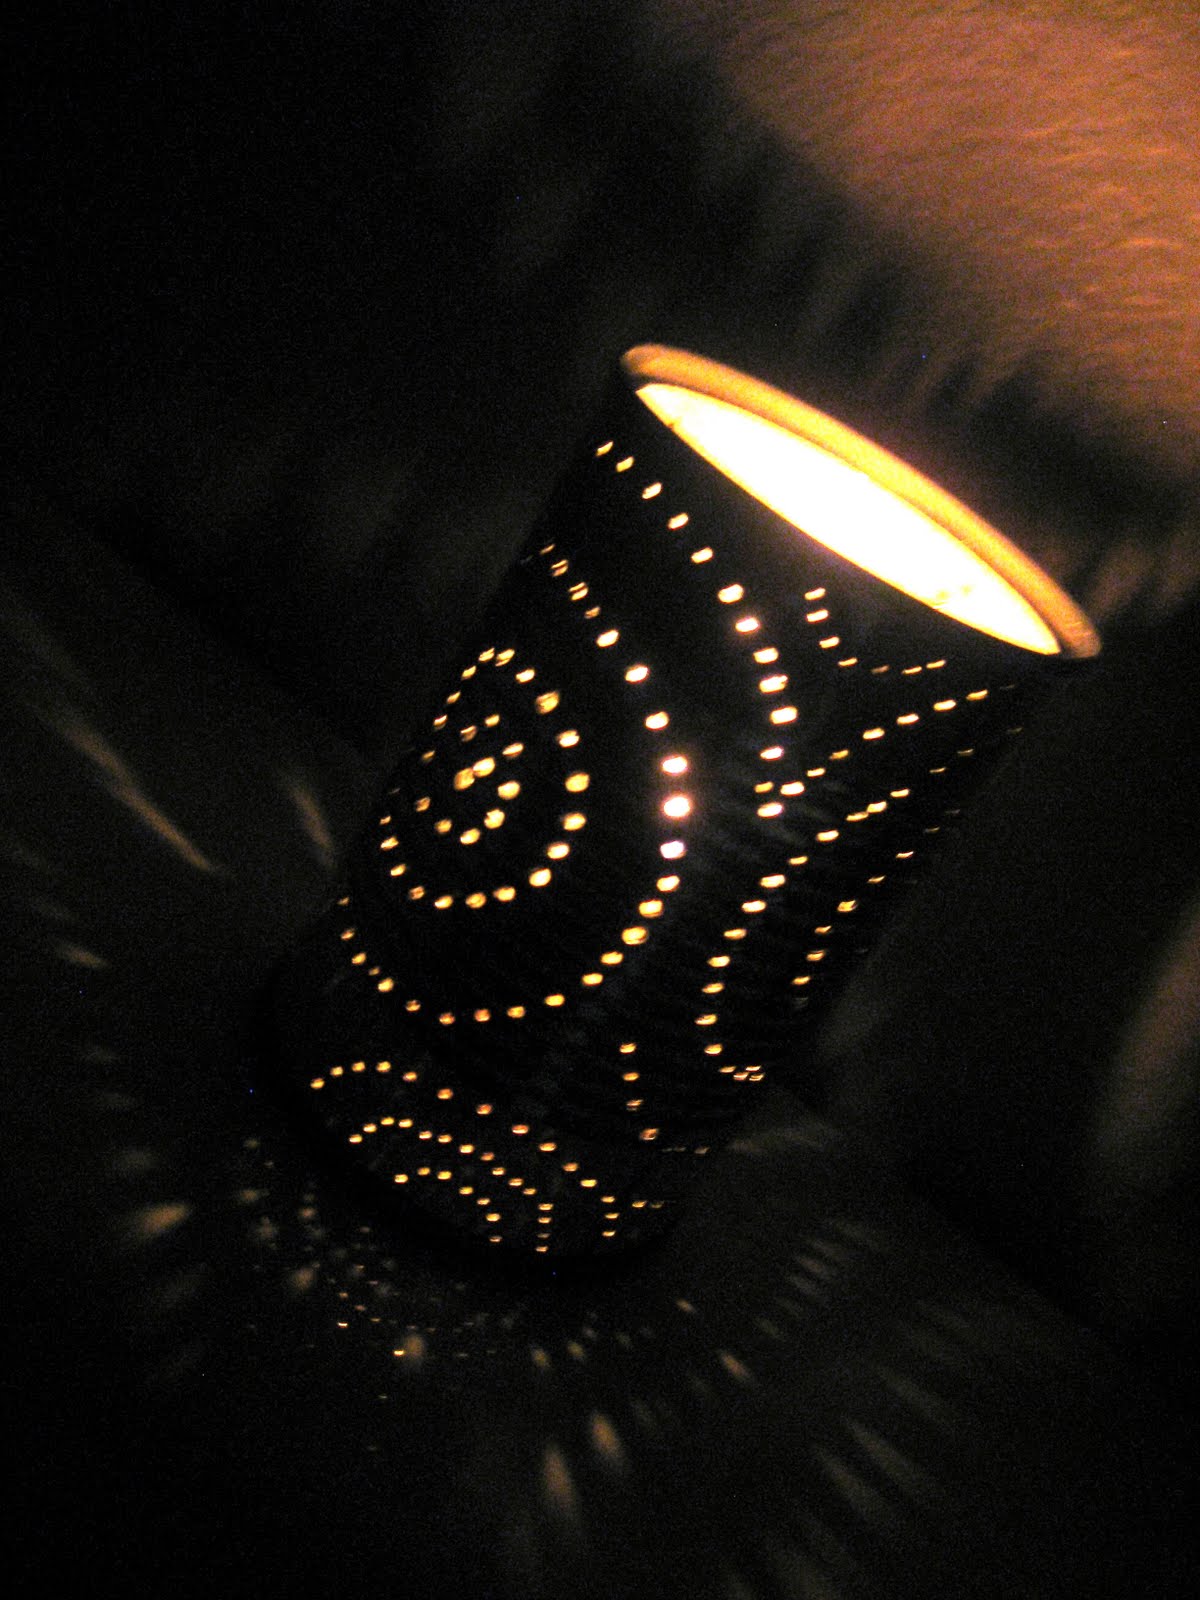
Tin Can Candle Holders
And then, out of nowhere, I was reminded of a project that I did during 2nd grade. Our teacher had us all bring in cans. We opened one end, washed out the cans, filled them with water and stuck them in the freezer. Once the water was frozen in the can we all marked designs on our cans. Anything we wanted with tiny dots of permanent marker. Then we were each presented with a hammer, a few nails, and an older student to help us. We then hammered the nail in a bit into each dot on the can. The ice prevented the can from denting in, and the nail and hammer created a pattern of holes all over the can. After we were done we let the
This project was a perfect way for me to use these canned peaches! It was fun and made me feel like a kid again. Plus it's literally a FREE diy project, that you're basically guaranteed to have supplies for! Unfortunately, I only had screws, no nails. But, It still worked just fine other than leaving a few blisters on my fingers!
**Update: I didn't think too far ahead by putting the holes all the way to the bottom of the can. You should leave the bottom bit unpunched, or else the melted wax will ooze out the bottom holes! Learn from my mistakes!
Monday, July 18, 2011
Orangina Bottles: Project 1
I am seriously addicted to Orangina. If you haven't tried it, it's basically carbonated orange juice. And it's amazing. There are a few different forms that Orangina is sold in, the run-of-the-mill plastic bottle, in a can (soda-style), and (my favorite) in gorgeous glass bottles. I buy these glass bottles of Orangina in six-packs at Trader Joes. Ever since I discovered these I've been trying to think of creative ways to re-use the bottles. I've come up with quite a list, but I'm just going to show you the first pr0ject I did using them. It's also definitely the easiest thing to do with them, other than the obvious vase option. But, I think we're all a little more creative than that, yes?
Step 1:
Buy Orangina
Step 2:
Remove the lid, the lid band (use sharp objects at your own risk as I did with my cuticle trimmers), and the label (it comes off very easily by peeling as much off as you can when it's dry, and then using warm water to scrub off the rest)
Step 3:
Find some sort-of cheap sconce . I bought mine a billion years ago at Walmart (I think) for next to nothing. They're not the fanciest, but they work.
Find something that you like the look of or that has some special meaning to you that will fit through the opening of the bottle. I have a soft spot for Maine so I used some sand from there as well as a collection of teeny tiny shells that I had collected.
Step 5:
Fill your bottles to your desired fullness. I didn't want them filled too much because I wanted the Orangina bottles to be as much of a star as the sand/shells.
Step 6:
Hang your sconces and set the Orangina bottles on them instead of candles. Voila. Wasn't that easy?
Sunday, June 19, 2011
Wine Cork Pendant!
I've been wanting to do some projects using wine corks for quite some time, and finally I've found my inspiration! I have some friends who work at wineries in Walla Walla, Washington and after not too much convincing (No convincing needed at all, really. I have fantastic friends! Be jealous.) they agreed to help me get my hands on a ton of used corks! I started on my first project using said corks a couple of days ago. Unfortunately, this project is requiring FAR more corks than I could ever have imagined, resulting in my running out of them before finishing! Luckily, the very same friends are willing to continue collecting them for me, which is good since I have a few more d.i.y. cork items in mind! (Do yourself a favor and google wine cork bath mat-- Flipping GENIUS!)
For my current project I'm using a styrofoam ball, hot glue, and, obviously, used wine corks! I plan on hanging it from the ceiling, probably, in my living room. (I keep wanting to refer to this project as a wine cork pendant? But, is pendant the right word? It certainly sounds better than "Hanging Wine Cork Ball", doesn't it? I think I'll go with pendant!) I'm posting a picture of how it looks so far, though bare in mind that it's not finished! So, definitely ignore the flower pot that it's in--it's just how I'm storing it until I can collect enough wine corks to finish it! Also, ignore any white styrofoam that might be showing through, I'll be covering that up with paint once I'm done gluing on the corks! Once that's all done, I just need to figure out how best to hang it! I'm open to suggestions!
Labels:
circle,
decorative,
diy,
hanging,
hanging wine cork,
hot glue,
paint,
pendant,
project,
round,
sphere,
styrofoam ball,
upcycled,
used,
Walla Walla,
washington,
wine cork,
wine cork ball,
wineries
Friday, June 3, 2011
I put the Dee in DIY!
Here's a few examples of my projects! The picture to the left is of some pillows I made for my parents house over Christmas! Behind the pillows in the picture is a pair of frames I got on clearance. I don't have a picture of the final product of that project, but basically I used the same fabric I used for the pillows as the backing for the picture frame, then I combed a couple of beaches in Maine for a TON of tiny pebbles (roughly matching in size) and hot glued them into the frame in a swirling pattern. It was VERY cheap and turned out quite cute (not all of the projects I come up with do!). The pillows were cheaper than store bought and it wasn't hard to find clearance fabrics. Also I prefer the pillow stuffing rather than the pillow forms because it gives me more control over the size and shape. This is especially convenient when you're not entirely sure what you want to do yet, which is nearly always the case with me! Plus the stuffing can be REALLY cheap. You can also find some very expensive stuffing, but, for me, I don't find it necessary!
The hat shown below was made using a pattern that I got from a store on Etsy. Etsy is one of my favorite places to shop. It's such a fantastic way for original designers, artists, and, well, pretty much any type of creative person you can imagine, to showcase their work, and, hopefully, make a little cash while doing it. The store that I bought this pattern from is here: http://www.etsy.com/people/pixiebell I can't say enough good things. I believe that this pattern was called the "Seed Beret". The pattern was straightforward and simple once I got the hang of it. Especially considering that I had never crotcheted anything before in my life (may I recommend youtube instructional videos for learning how to do just about anything)! And whipping out one of these hats is ridiculously fast (last minute gift idea, anyone?!). I just loved the way it turned out, and my friend, Jeanine, didn't mind it at all either!
Well, that's enough DIY talk for one day! I just love how popular DIY has become, and how simple it is to find great ideas for just about anything online! I'm always looking for my next project or inspiration! I think if everyone did a little DIY then the world would be just a little better!
Labels:
cheap,
diy,
easy,
fabric,
Friends,
gifts,
i love maine,
ideas,
inspiration,
locker hook,
pebbles,
picture frame,
pillows,
pixiebell,
rug,
rug canvas,
seed beret
Tuesday, April 13, 2010
I made CURTAINS!!
After finding some fantastic material on clearance on joannfabrics.com last SUMMER, I finally got around to utilizing it! It was actually a rather uneventful process that involved measuring tapes, 9 yards of material, crawling around my living room on said material, and, of course, some headache with a sewing machine that I haven't quite mastered yet (though, the three days it took to finally get the curtain rod hung up made the sewing seem like a breeze...who knew?!)! Nontheless, I am quite proud of my accomplishment!
Subscribe to:
Posts (Atom)